Rules for planting spinach and outdoor care
Content
Landing
Before planting spinach, you need to prepare the soil. Ripening of spinach greens occurs quickly enough, therefore, the fertilizers used to feed it should be fast-acting. In early spring, it is recommended to scatter granulated urea over the snow. Later, before sowing the seeds in the ground, you need to add a little humus. It should be remembered that spinach leaves accumulate nitrates well, so nitrogen fertilizers should not be used in the spring.
It is more correct to prepare the soil for growing spinach in the fall, then the need for spring feeding with nitrogen disappears. The site where the crop is planned to be planted must be dug up and a full range of organic and mineral fertilizers must be dug into the soil: compost, humus, a phosphorus-potassium mixture, as a rule, a certain amount of nitrogen is always contained in the complex mixtures. Then in the spring it remains only to loosen the soil in the garden, and you can sow spinach.
Cultivation of a culture is more successful in loose nutrient soil. Good air and moisture permeability is the main condition for the active growth of greenery. The best option is sandy loam soil with neutral acidity. In heavy, clayey, crusty soil, spinach should not be planted, as this will require more careful plant maintenance, and the likelihood of a good harvest is very low.
Next, you need to take care of the preparation of the seed. Spinach seeds have a fairly dense shell, so it is recommended to soak them in warm water for a day, then place them in a potassium permanganate solution for several hours, and only then can they be planted in the open field. There are some varieties of spinach, such as New Zealand, Victoria, Korenta, whose seeds are not distinguished by fast germination - soaking for these varieties requires a longer period (up to 2 days), and with the use of biostimulants.
Planting a plant in open ground can be carried out both by seeds and from seedlings. However, the seedling method is less popular, since young plants have weak roots and take root very poorly in the ground. It is reasonable to sow on seedlings only thermophilic varieties (Matador, New Zealand), which are undesirable to plant directly into the soil in early spring.
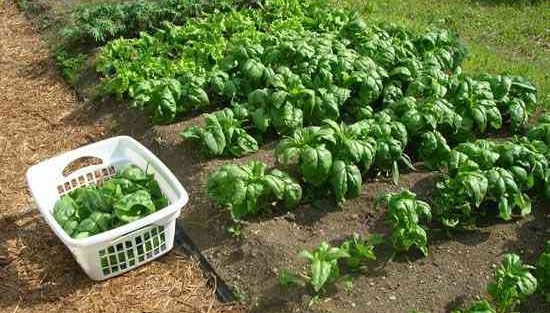
In order to plant seeds in the country in the open field, you need to make shallow furrows of any length in the prepared soil at a distance of 15-20 cm from each other. Then water the rows with water and sow seeds in them, embedding in the soil no more than 1.5-2 cm.Spinach is quite cold-resistant, but if planting is done in early spring, it is better to play it safe and cover the garden bed with a film - this will not only protect the seeds from cold, but also accelerate their germination. From properly prepared seeds, seedlings appear in 5-7 days.
City dwellers, as well as gourmets who want to receive vitamin greens all year round, are more interested in the question: how to grow spinach on the windowsill of their own home, and what should be the care of the plants? Growing greenery at home on a balcony or windowsill is no more difficult than planting it in the country. First you need to prepare a container and potting mix.
At home, you can plant spinach seeds in an ordinary flower pot with a volume of 1 liter, or in a plastic container with holes in the bottom, from which you can later dive the plants into a separate container. It is imperative to lay a drainage layer at the bottom of the pot (container), since spinach loves moisture very much, but stagnant water is harmful for it.
A soil mixture for growing a culture at home can be prepared from 1 part of sand, 2 parts of turf and the same amount of humus, or you can use a substrate consisting of 1 part of vermicompost and 2 parts of coconut fiber. Seeds are planted to a depth of 1.5-2 cm, the container is covered with film or glass until shoots appear. At home, as a rule, the air is too dry and very warm, and plants need a temperature of 15-17 ° C for normal growth, so you should take care of creating such conditions in advance.
Video "All about growing spinach"
Demonstration video with tips and information on growing spinach.
Growing features
Spinach does not require any special care and conditions, since it is an early ripening and rather unpretentious crop, however, there are some points and features, taking into account which you can make the cultivation of healthy greens more successful and high-yielding:
- Potatoes, radishes, legumes, cucumbers, zucchini, tomatoes are considered the best predecessors of spinach, in addition, you should not plant a crop for more than 3 years in one place;
- the area for growing a crop should be open sunny (experienced gardeners recommend planting spinach on a small hill), however, in hot summer, the plant feels good in partial shade;
- spinach vegetation lasts no more than 2 months - in order to have useful greens throughout the season, it is recommended to plant seeds in the country in several stages with an interval of 2 weeks;
- it is possible to plant a crop in open ground not only in spring, but also in autumn - if the seeds are sown at the end of August - September, then fresh greens will appear in early spring, and the overwintered seeds will become stronger and the harvest from them will be of better quality;
- plants grow poorly in acidic soil - you can reduce acidity by adding lime, chalk, dolomite flour;
- To extend the growing season of spinach, experienced gardeners recommend cutting off the tops of the shoots of adult plants - this promotes the formation of new leaves, and prevents the appearance of arrows with peduncles.
You also need to take into account that the cultivation of each variety of spinach has its own characteristics. Usually there are no problems with early ripening varieties, such as Giant, Godry, and the now popular Matador hybrid also grows well. But, for example, New Zealand spinach is more demanding on conditions. Firstly, planting of the Novozelandskiy variety in open ground should be carried out only from seedlings, since the culture is very thermophilic. Secondly, the seeds of this variety germinate very poorly, and one cannot do without a growth stimulant.
However, New Zealand spinach, beloved by many, also has certain advantages: thanks to its lush greenery, adult plants suppress the growth of weeds, therefore they practically do not need weeding, and besides this, the New Zealand variety does not bloom and does not release arrows during a drought, as is typical for other species. Growing a culture at home also has its own characteristics. If the seeds are planted in winter, it is more likely that the plants will lack sunlight and will need additional lighting.Considering the fact that in apartment conditions it is almost always warm and dry, and spinach is a moisture-loving plant, you need to constantly monitor the soil moisture and regularly spray the foliage.
Care
Caring for spinach in the open field consists of timely weeding and watering. The first weeding is carried out as soon as the first two leaves appear on the plants - during this period the bed must be thinned out, leaving the strongest shoots at a distance of 10-15 cm. At the same time, you need to remove the weeds and loosen the aisles. Further care of the crop includes another 3-4 weeding.
It is necessary to water the garden often, since drought leads to stalking of the bushes and the cessation of the growth of green mass, but at the same time the plants should not be flooded. Top dressing of spinach is carried out only if it grows in depleted soil - for fertile soil, there are enough fertilizers applied during soil cultivation. Spinach greens, which are grown at home in a pot, require very minimal care: regular watering, loosening, and spraying the foliage. Houseplants need plenty of daylight, but the humidity should be high enough.
Spinach rarely gets sick, but the appearance of powdery mildew and rot on the leaves is possible. In this case, the care consists in removing diseased plants from the garden, since it is undesirable to use chemical agents for the culture.
Harvesting
Collecting spinach begins when 5-8 leaves grow in the outlet. For each variety, this period occurs at different times: early ripening varieties (Godry, Giant) ripen in 18-25 days from the day of sowing, late and mid-ripening varieties (Victoria, New Zealand) are ready for harvesting in 6-8 weeks. Even if New Zealand spinach is planted from seedlings, the first crop can be harvested no earlier than a month later, because at the very beginning after planting, the plants develop very slowly.
When collecting greens, you need to carefully tear off the outer leaves, leaving the middle of the outlet intact. It is better to harvest in the morning after the ross dries up, or in the late evening before it appears - the greens must certainly be dry, since wet leaves rot faster. The harvest period depends on how often the leaves are cut and how well the garden is cared for. In any case, spinach is harvested only before the crop blooms.
Storing spinach
There are several ways to store spinach. For short-term storage, the greens are folded in polyethylene or a damp cloth and placed in the refrigerator, while the leaves should be dry, since the wet ones will quickly rot. At temperatures from 0 to +1 ° C, spinach leaves are stored for up to 10 days.
For long-term storage, spinach is frozen, dried, canned. For freezing, both fresh herbs and blanched, or chopped to a puree state are suitable. To freeze fresh herbs, the leaves must be washed, dried, then cut, folded into a bag or container, and placed in the freezer. The same can be done with blanched spinach.
For drying, greens are prepared in the same way as for freezing, only they are laid out on paper or a baking sheet, placed in a dry, dark place, where the drying process takes place. Many housewives practice this method of harvesting as salting or canning. In both cases, spinach retains its intense green color and health benefits.
Spinach Planting Tips
Informational video with helpful tips for planting greenery.


