How to build and equip a bio-vegetarian with your own hands
Content
Is it worth using a bio-vegan
Unambiguously solar bio-vegetarian is a new technology in the world of growing garden crops. Currently, such designs can be found both in small private farms and in large, business-oriented ones. Ivanov's solar vegetarian has gained such fame due to the following benefits:
- due to the large amount of glazing, the illumination is improved several times, due to which the growth of plants is improved due to the large amount of sunlight;
- the ventilation system of the solar bio-vegetarian is designed in such a way that the air is purified without the loss of chemical elements necessary for plants, such as carbon dioxide and hydrogen;
- if you correctly build a solar vegetarian with your own hands, then the heat loss in winter will be minimal, while in an ordinary greenhouse it is impossible to maintain an optimal microclimate without an additional heating system;
- the project of the vegetarian includes such a roof, when the sun's rays fall at a right angle, which is why so much sunlight accumulates inside the room, which helps to preserve the maximum amount of heat and energy necessary for the growth of vegetables and fruits.
Video "Benefits of Bio-Vegetarian"
From this video you will learn what a bio-vegetarian is and why it is worth building on a summer cottage.
Features of bio-vegetarian
Before talking about the design features, a few words should be said about its inventors. It is believed that the first solar vegetarian, which is also known as "biofactory" and "solar greenhouse", was invented by the Soviet physics teacher from Kiev A. Ivanov.
In addition, there is information about the Chinese inventor Wang Lei, who also patented the rights to build a solar greenhouse. However, in the recent past, the technology received a new round of transformation: the Russian inventor S. Konin made modifications to the drawings of the structure, which is why the invention of the vegetarian is often credited to him.
Bio-greenhouses of the Scandinavian type also became famous, which, in fact, are Ivanov's greenhouses, but are called so because of the popularity of ecological gardening in Western Europe. It is from the Scandinavian countries that the fashion for ecological gardening and year-round cultivation of crops in greenhouses comes to Russia. So, in fact, greenhouses based on Scandinavian technology, bio-vegetarians Konin and “smart” greenhouses do not exist, since they are all just additional names of Ivanov's Soviet design.
This sustainable gardening system has several key features:
- The presence of a reflective rear wall of the room. The structure of the building provides for most of the transparent surfaces.However, the back wall, which can stand alone or be an extension to a house or shed, is covered with reflective foil, which will redirect the sun's rays to illuminate the beds.
- As already mentioned, a do-it-yourself solar vegetarian is built with transparent walls and a ceiling, where the ceiling and floor are parallel to each other.
- The accumulation of heat is created due to the constant long-term illumination of the greenhouse. For long-term illumination, transparent walls must face south.
- Heating and air purification occurs due to the laying of perforated pipes to a depth of 35 cm, to which an air circulation system (fans) is connected, which cool the air in summer and heat it up in winter.
Thanks to all of the above advantages and features, the user of this gardening facility, with the correct installation of the irrigation and lighting system, gets the opportunity to grow vegetables in large volumes all year round. Even if no additional lighting is installed, the growing season can be extended by two months.
Moreover, the microclimate, which is closest to the natural one, allows the use of a minimum amount of chemical fertilizers and pesticides (most often, the owners of biofactories turn to vermiculture and vermicompost).
Dimensions and construction drawings
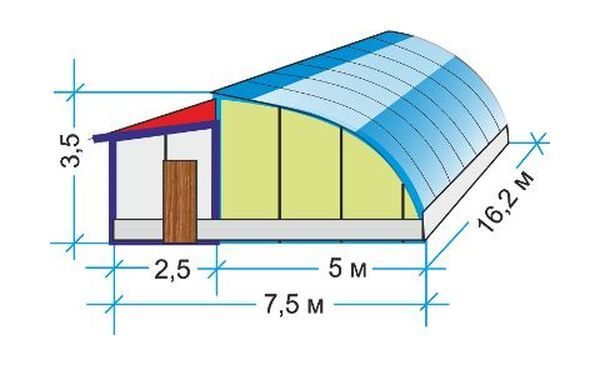
Do-it-yourself step-by-step instructions for building a bio-type greenhouse begin with the choice of the drawing and the dimensions of the structure. The floor plan can be found on the Internet or ordered from a design firm, but the dimensions will need to be thought out in advance. They depend on your financial capabilities, area size and requirements. Typically, the size of the room is between 4 m wide and 6 m long. Height - for your height.
The main thing to consider during construction is the level of inclination of the floor and ceiling. In order for the lighting to be complete, the beds are built in a cascade, for which the floor level must be located at an angle of 30–35 °. The ceiling should be parallel to the floor.
As already mentioned, the rear north wall should be solid and covered with insulation and reflective material. The best option would be to attach the building to the wall of the house.
Preliminary preparation
When proceeding with the step-by-step implementation of the instructions for building a new generation greenhouse, you should start with preliminary preparation.
Seat selection
The real experience of the self-organization of a bio-vegetarian indicates that the choice of a place for a room plays an important role in construction. Since the design provides for maximum lighting, the place should be well lit by the sun, there should be no trees and shrubs nearby.
As for the slope, it can be either natural or artificial. However, it is best not to locate the greenhouse in a low-lying area where there are risks of water accumulation.
Material for the frame and insulation
It is difficult to build a biofactory yourself, but the choice of high-quality materials greatly facilitates the task:
- concrete, cement support pipes and fittings are used for the foundation;
- the frame block is recommended to be made of rectangular steel pipes and wooden beams (you can also try using metal-plastic pipes);
- walls are covered with polycarbonate sheet 8 mm thick;
- in the future, ventilation systems and, if necessary, an automated water supply and lighting system are installed.
Also for construction you will need tools: jigsaw, drill, screwdriver, drill, hammer, level, vessels for mixing concrete and mortar, as well as other professional-type construction tools.
Step-by-step instruction
The construction plan includes the following steps.
Installation of the foundation
On a prepared flat plot of land at a distance corresponding to the drawings, holes are made in the ground with a depth of 5–6 cm, where support pipes are then installed. Reinforcing bars are installed inside the pipes, and everything is poured with concrete together. The required angle of inclination is determined using the building level, after which the pipes are cut off and the reinforcement cage, sheathed with wooden boards, is installed. Holes are made inside for ventilation and drain pipes, after which the foundation is poured with concrete. Further, around the frame, you can make an earthen embankment, plant it with flowers or low shrubs.
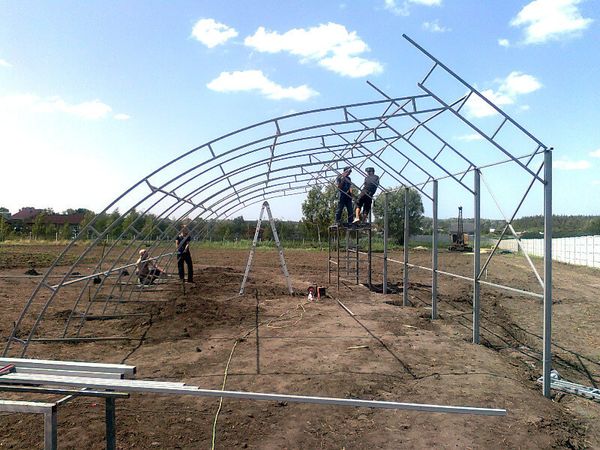
Assembling the frame
The frame made of metal bars is connected by a welding machine or strong bolts, which is an unsuccessful option for a long-term structure. After that, the frame is installed inside the cement pipes, and galvanized steel water drains are placed on the bottom.
Sheathing and insulation
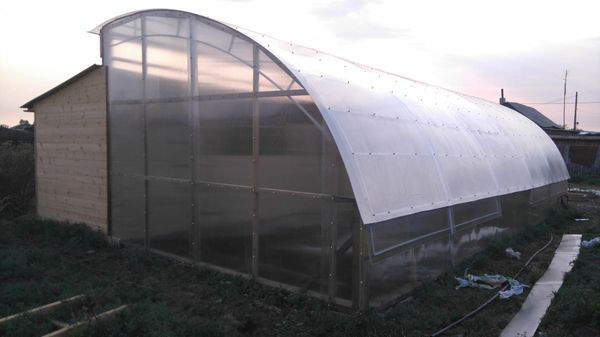
Wooden frames and polycarbonate sheets are used as cladding. Frames are made in advance, then fixed on a metal frame, after which you can start installing polycarbonate using self-tapping screws. Do not forget to treat all wooden elements with an antiseptic, moisture-repellent liquid before installation, and paint if necessary.
Doors and windows
Doors and windows are installed last. In order not to disturb the structure, it is better to choose wooden frames for doors and windows, and polycarbonate glazing. The door is placed on the end wall, and the windows can be additionally equipped with an automatic opening system.
Greenhouse equipment
At the last stage, the greenhouse equipment is carried out.
Watering
An additional irrigation system for a standard set of crops (cucumbers, tomatoes, etc.) is not required, as moisture accumulates from the air exchange system. As a result of ventilation in the room, condensation accumulates from the moisture contained in the soil, which serves as a moisturizing element. This system allows you to keep the microclimate in the greenhouse in its original form.
Heating
Heating is provided by fans installed at the base of the pipeline. The fans can be powered by electric boilers or other air heating systems.
Ventilation
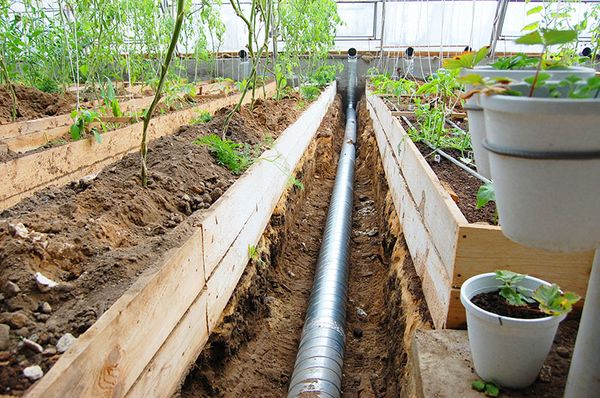
Ventilation is carried out by laying a pipeline at a depth of 50 cm. For this, small holes are made in the pipes, after which they are connected and laid on a 20-cm layer of expanded clay. The pipeline is connected to the air exhaust system on one side, and fans on the other. The pipeline is laid at an angle and closed from the outside with a net.
Garden beds
The beds in the vegetarian are collected in the form of boxes, which are placed in a cascade type. As the material of the boxes, you can use both wood and building stone or brick.
When building a solar plant, pay attention to the tightness and correct location of the building, since technological errors can lead to the loss of functionality of the room.


