Summer vacation with comfort: how to make a sun lounger out of wood with your own hands
Content
Variants
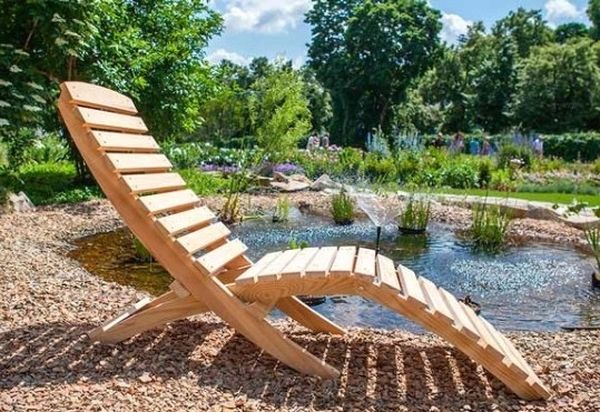
Although it is possible to make a sun lounger by hand from aluminum or polyvinyl chloride (PVC) pipes, lumber is more suitable as a material. Such furniture fits well into the surrounding landscape of the suburban area. It is only necessary to choose the right type of wood, which will successfully withstand a long stay in the open air.
Experts recommend using beech, oak, larch and ash. True, a self-assembled product from such wood turns out to be heavy.
It is also advisable to choose a suitable design. There are sun loungers:
- monolithic - all parts are fastened into a single whole, disassembly is not provided;
- folding - something like a chair, where a piece of dense fabric stretched over a cross-shaped frame forms a seat and a back;
- stationary - a bed with a rising and adjustable back.
Although most often sun loungers are made from timber and planks, ordinary logs can also be used by cutting the required amount of the same length and fastening it into a curved structure using long self-tapping screws.
Another option is to build a chaise lounge from pallets, fastening a couple of pieces at the desired angle.
Video "Chaise longue for the garden with your own hands"
In this video, you will learn how to make a wooden deck chair for the garden with your own hands.
DIY making
Since you have to work with wooden parts, the master needs to stock up on suitable tools:
- hand or electric saw;
- screwdriver;
- jigsaw;
- drill with a set of drills;
- metal corners;
- sandpaper or sander.
In addition, you should purchase paint or varnish that will protect the wooden parts from premature wear.
Suitable building materials:
- blockboard, at least 2 cm thick;
- short boards 0.25 cm thick;
- bars for the frame.
Folding model
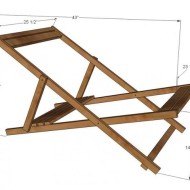
To make the simplest sun lounger in the form of a folding armchair with a fabric back, you will need a detailed drawing. According to the scheme, the required parts of the required dimensions are procured, separately - for the back and legs, fasteners and the fabric itself.
Each part is pre-processed: cleaned of burrs, polished and impregnated with anti-corrosion compounds. On the legs, triangular cutouts are made with a step of 25–35 cm, allowing you to adjust the angle of the backrest. Also pre-drilled holes for bolts according to the existing drawing.
The assembly diagram is as follows:
- Collect the backrest frame. Two strips of 2x4x122 cm are fastened with transverse strips of 2x4x65 cm, two are at the headboard with a gap of 1 cm, and one is 5 cm from the very bottom.
- The seat frame is assembled in the same way. You will need two similar slats, but somewhat shorter - 112 cm, which are fastened with two slats at the head of the head with a step of 1 cm and four - in the lumbar region with a step of 1.3 cm.
- Having put the seat frame into the backrest, drill the necessary holes and fasten the structure with bolts and nuts. So that the fasteners do not loosen, it is advisable to screw in another lock nut or put them on glue. Check how the free movement of both frames is carried out.
- The backrest mount is mounted. Attach two 38 cm long strips to the frame, connecting them at the bottom with glue to a wooden rod of a suitable diameter (you need it to fit into the triangular cutouts without interference).
The fabric needs to be strong. Canvas, tarpaulins or jeans will do. For a chaise longue, you will need a cut of 140 x 116 cm.
Next, you should adhere to the following algorithm of actions:
- The fabric is folded in half, stitched with an indent of 1.5 cm from the edges.
- Turned out to the front side.
- For fixing, it is better not to fasten the fabric to the slats, but to sew it around a pair of fixing rods - at the head and below.
- Insert the fabric into the slots between the upper backrest slats and the lower seat slats, insert the fixing rods.
This approach will allow, if necessary, to easily remove the fabric, remove the rods and send them to the wash.
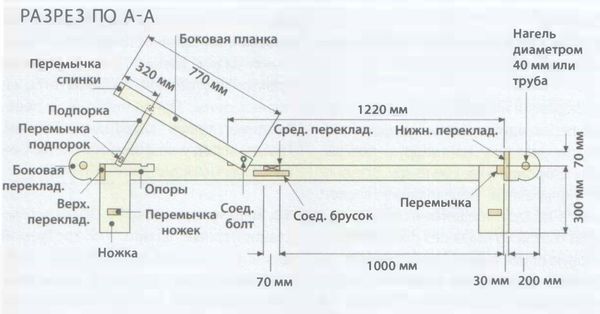
Stationary
A chaise longue in the form of a bed with an adjustable back is more difficult to move from place to place, but it is much more convenient for rest. For manufacturing you will need:
- bars for the frame (longitudinal and transverse);
- slats for the seat, backrest;
- bars for legs;
- screws and studs.
As in the first case, you need to work with parts pre-treated with anti-corrosion compounds. The installation process consists of several stages:
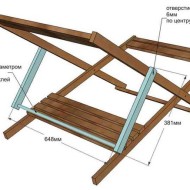
- The frame of the bed is assembled from a pair of longitudinal beams 2.15 m long and a pair of transverse ones 50 cm long. The parts are fastened with screws.
- In the lower part, the frame is sheathed with transverse boards 60 cm long in 1 cm increments, forming a bench seat.
- The legs are mounted below: in pairs at the legs and one bar at the head. The length of the bars is selected according to the requirements for the height of the bench.
- In the rest of the frame, a folding adjustable backrest frame is assembled: two longitudinal bars are fastened with three transverse ones. The frame should fit easily into the frame.
- The back is sheathed with longitudinal boards. It is better to make the upper edges of the beauty boards rounded in advance.
- So that the backrest freely rises at an angle and lowers, it is attached to the frame of the lounger with steel pins.
- Having raised the inner frame, pairwise grooves are cut out in the remaining part of the frame to adjust the angle of the backrest. The distance between the grooves is 20 cm.
A special bar is inserted into the finished grooves, which will fix the raised back frame in one position. To change the angle of inclination, the bar is simply moved to another groove.
Decor
After the wooden product is ready, it is recommended to process it. For this purpose, all parts are painted or varnished. Before that, they are checked again, get rid of any remaining irregularities on the surface (grind, etc.).
Of course, lying on bare boards is uncomfortable. It is advisable to stock up on a long mattress or pillows, making your stay on the couch more comfortable.
Although we have given examples of assembling the most simple pieces of furniture, improvisation is quite acceptable during installation:
- in a prefab chaise longue, the fabric can be replaced with a series of cross bars if you intend to sit on soft cushions;
- the stove bench is retrofitted with wheels, making it more mobile.
For maximum comfort, any product can be equipped with a visor that creates a shade or a kind of shelter from a light rain.

