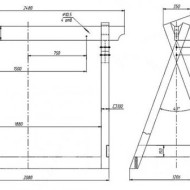
DIY garden swing: drawing and step-by-step instructions
Content
Types of swing
The easiest way is to hang a strong rope of sufficient length on a stable branch of a tree, fastening a kind of seat to it from a thick board. Better to take a nylon rope through the holes drilled in the board. For reliability, you can use chains by placing them in plastic tubes. Well, do not forget to check the strength of the structure from time to time, since with active use the tree branch will gradually collapse.
However, it is much better to make a homemade mobile structure that would be easy to move around the site. Such a swing can be:
- provide a canopy from the sun or rain;
- equip with a comfortable seat for several "seats";
- make folding and clean in the house with the onset of cold weather.
As a material for the construction of such a structure, they use:
- timber;
- strong elastic rope;
- metal pipes;
- wooden pallets;
- plastic;
- an old chair or sofa with legs removed.
However, if necessary, the swing can be made stationary by digging in securely or concreting the support posts.
Video "Garden swing with your own hands"
This video will show you how to make a quality garden swing out of wood.
How to make a frame
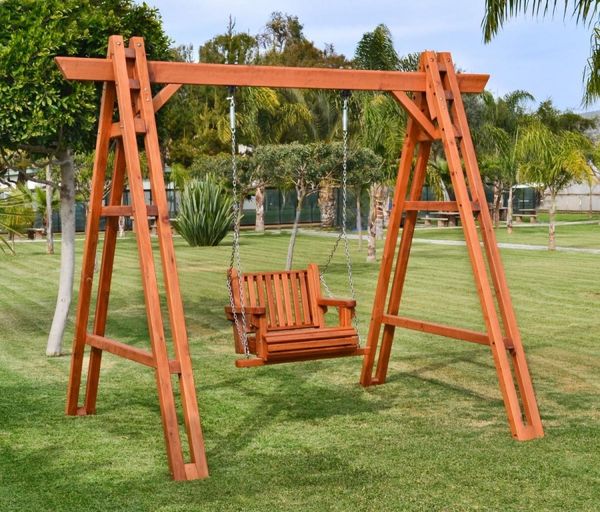
Structurally, the swing consists of a support frame: two triangular sidewalls and an upper crossbar. A bench of suitable width is suspended from the crossbar on cables or chains. Let's consider several ways to make a frame.
Made of wood
This is the simplest and most affordable version of a children's garden swing. Materials can be purchased at any hardware store.
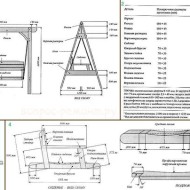
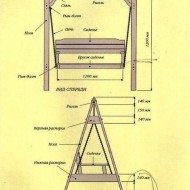
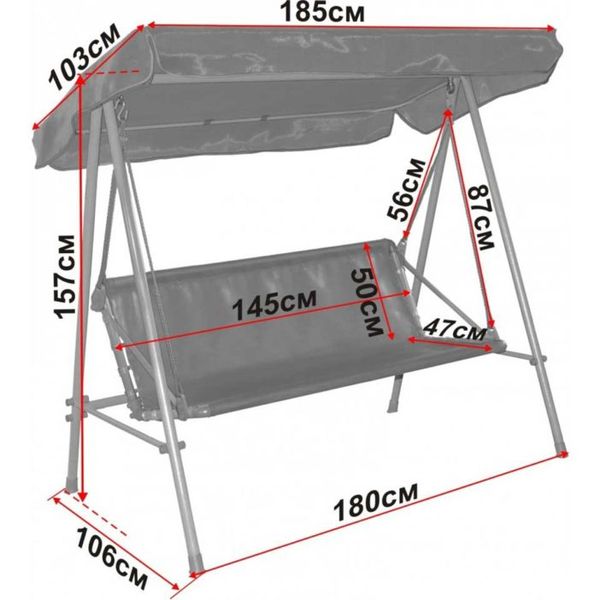
You will need four 2m side posts for a swing 190cm high. The crossbeam should be 180cm long if you want the swing to hold two people. The bench for the seat should be made 40 cm high and wide. It is advisable to hang the seat on two chains of 2.5 m each.
For work, you will need an electric saw, a drill with a set of drills, a ruler.
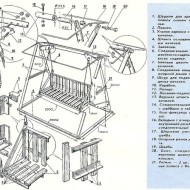
A wooden frame is created in several stages:
- With the help of an electric saw, the bars are prepared: first, they are trimmed on one side, then on the other, adjusting to one size.
- You need to connect the side supports in pairs using small bars. One is located at the very top - the crossbar will later lie on it, a couple of others of different sizes fasten the supports in the manner of the letter "A" - at the top and in the center.
- Attaching the bars, drill them together with the racks. Depressions are made in the bars to make it easier to screw the fasteners with a special key later.
- All parts are fastened with screws with a hex head ("wood grouse").
- In the racks, holes are drilled in advance for self-tapping screws that will hold the crossbar.
- They put the racks vertically, put the crossbar on top, begin to fasten it with self-tapping screws, then with metal corners.
- For reliability, spacers are added on both sides of the structure: one end rests on the ground, the other should be fixed at the top at the intersection of the bars.
Instead of a bar, you can use logs of arbitrary thickness, the number of parts and dimensions are about the same.
Made of metal
The metal frame is much heavier than the wooden one, so stationary swings are mostly made of this material. You can use profile pipes of square or round cross-section. The frame turns out to be strong, this design successfully withstands the weight of two and three riders.
There are many options for building schemes for a garden attraction. According to the drawing, the required amount of materials and their dimensions are already selected. For the frame, profile pipes with a diameter of 2 cm, steel corners and steel arcs with a diameter of 1.5 cm and a length of 25 cm are suitable.
Of the tools, you must have:
- welding machine;
- pliers and hammer;
- a hacksaw for metal (preferably a grinder);
- tape measure and building level.
For fastening, you will need M6x30 bolts with appropriate nuts, spring washers, lifting shackles and eye screws 5x80 mm.
Here are the main stages of assembling a metal structure:
- 4 side posts with a height of 2.5 m and a crossbar with a length of 2 m are cut.
- One of the ends of the pipe is cut at an angle of 30 °.
- Pipes are welded in pairs in isosceles triangles.
- At a height of half a meter, a transverse beam of a meter length is welded.
- A transverse beam is welded on top. It should protrude about 5 cm on both sides.
The bench is attached to the metal crossbar in two ways:
- With a spring. This mount will also act as a shock absorber. The spring eyelet is welded to the crossbeam.
- Through the ring. It is fastened with an anchor or a special installation site is built. The metal beam will have to be drilled, then the mount is inserted into it and the bolts are securely tightened.
It is advisable to securely fix a stationary welded swing in the place where you are going to place it. For this:
- dig 4 holes for all side racks;
- a sand cushion 10 cm high is erected at the bottom;
- a structure is installed in the pits, a few large stones are thrown, then concreted to the surface.
In a few days the concrete will harden and the swing will be ready.
Bench options
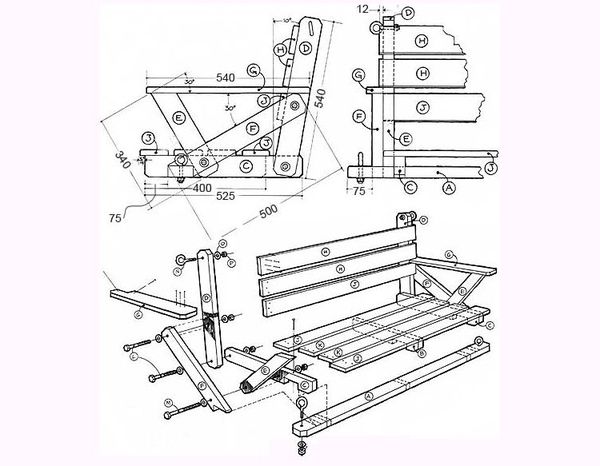
If a finished bench is not at hand, you can also make it yourself. Let's describe step by step the process of manufacturing and assembling from wood:
- We cut six wide boards of the same length - three for the back, three for the seat.
- For beauty, the top board of the back should be processed by cutting out simple waves along the upper edge, rounding the edges and removing the edges.
- We remove the edges on all boards, grind with a drill with a Velcro attachment.
- A bench is assembled on long bars. The extreme bars are made longer so that they protrude 4 cm on both sides, chains will be attached here.
- In the center of the seat, two support blocks are mounted with a step equal to the thickness of one (the central block of the back will be fixed between them).
- In the same roughly scheme, we connect three boards in the back. The center support bar is immediately placed midway between the two from the seat.
- Lean the back against the wall, align it in relation to the seat at the desired angle, then connect both parts.
You can also equip the bench with armrests by cutting and sanding them to the desired shape. It is better to attach them to the seat using cylindrical bars.
If you are assembling a swing from metal, the same profile pipes should be taken as the basis for the frame, but the bench itself is still made of wood.
This is done as follows:
- 24 bars each one and a half meters long are cut.
- All blanks are deburred on a machine or using sandpaper.
- The wooden parts are varnished and allowed to dry. This will keep the bench from rotting and give it a more elegant look.
- The frame is made of pipes with a diameter of 1.5 cm. The pipes are slightly bent in the back area, then welded into a curved frame.
- Wooden blocks are attached to the frame with a step of 2.5 cm.
- Two eye-nuts are welded along the edges, to which the chains will be attached.
Upon completion, it is recommended to paint all metal parts with anti-corrosion paint. However, for greater safety, as well as to extend the durability of the material over the structure, it is advisable to build a canopy that protects it from bad weather.
Canopy
The outdoor swing visor is optional, but makes it more comfortable to use. The canopy will perfectly protect from the sun's rays; under it you can wait out the short summer rain. The visor is made of polycarbonate sheets or PVC. The frame can be made of wood or metal.
For installation, a rectangular frame is constructed from any strong material. Polycarbonate is attached on top or simply covered with fabric to save money. It is advisable to attach the canopy to the swing at a slight angle so that the water flows back when it rains.
Decor
Since the building will be under the open sky all the time, the first decorative adornment should at the same time fulfill the functions of protection.
The metal frame of the swing is painted with a special paint against rust. In addition, metal can be coated:
- rust solvent;
- enamel;
- primer.
It is advisable to repeat this treatment once every six months or a year.
Wooden parts are painted or varnished.
To increase comfort, it is advisable to cover the suspended swing with pillows or a mattress to make it more comfortable to sit. Often, beauty seats are covered with thick covers. It is better to sew the latter from a material that is not afraid of moisture.
The side supports can be painted with patterns or pasted over with stencil pictures (this work should be entrusted to the smallest ones).
Whatever swing you build on the site, the main thing is that they are strong and of high quality. After all, not only children will ride them, but also adults, and all without exception. Therefore, reliability should be at the forefront.

