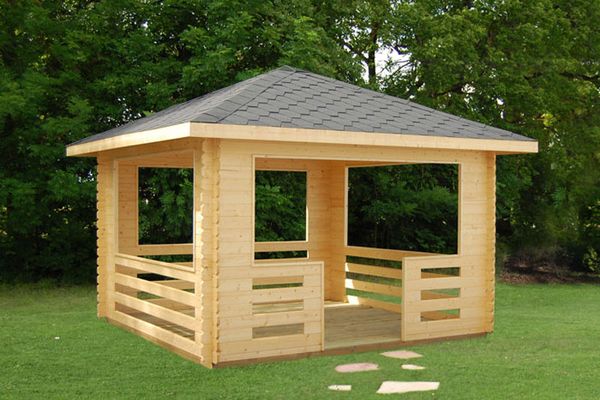
Do-it-yourself simple and cozy gazebo made of wood - step by step construction
Content
Types of gazebos
Altanka differ in shape, material of manufacture. Usually they are divided into open and closed. The first option is summer, but the second can be operated in subzero temperatures. You can often see combined gazebos, for example, a solid wood frame, and a roof made of soft tiles.
In terms of shape, structures are square, rectangular, round, etc.
In terms of the complexity of the construction, the premises are simple and original. If you rely on yourself, there is no point in complicating the workflow. You need to act according to the standard template. To emphasize the appearance of the structure, it is enough to decorate it correctly. If the priority is something unusual, you have to sweat, as they say.
Video "How to build a gazebo with your own hands"
From this video you will learn how to build a wooden gazebo with your own hands.
Stages of construction on their own
For the workflow to be effective, you need to properly prepare for it. Garden gazebo made of wood - a simple structure, equipped with a roof, frame, floor. Before you start building, there are a couple of things you need to do. One of them is wood treatment with antiseptics. When the composition is dry, you can start working.
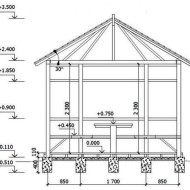
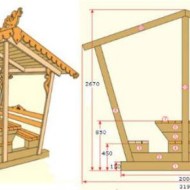
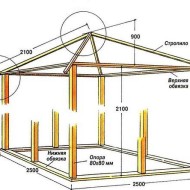
An important point is drawing up a construction diagram. In the drawings, indicate the dimensions of the building, its functional components, and finishing features. Based on the plan, you can't go wrong with the amount of material.
The main assistants to the builder are tools. You will need a saw, hammer, tape measure, nails, bolts, screwdriver, drill, level, etc.
Foundation
In order for a large building to serve as long as possible, we recommend building it on a concrete base. Some structures do not need it, but, as a rule, these are lightweight portable structures that serve in a certain season. Columnar, monolithic, pile-screw or strip foundation will guarantee the durability of the gazebo.
Here is a step-by-step instruction for making a base with your own hands:
- Prepare the site, remove the top layer of soil, remove plants and debris.
- They make a foundation pit.
- Formwork is being built.
- On sandy soils, a mixture of crushed stone and sand is poured into it, all this is carefully rammed.
- To increase the strength of the base, a reinforced mesh is installed.
- It remains to pour concrete on top. Its complete solidification usually occurs within 14–20 days.
The types of foundations are different, and which one to build depends on many nuances. If time is short, concrete blocks can be placed on the "cushion" of sand and gravel. A longer process - with the manufacture of brick posts, even longer - to pour them out of concrete. The optimum distance between the supports is 150-200 cm.
To make everything work smoothly, do not forget to pull the rope from each support. When the initial stage is over, we lay the waterproofing material on the structure. Roofing material is suitable, tol, bituminous mastic is quite effective.
Floor
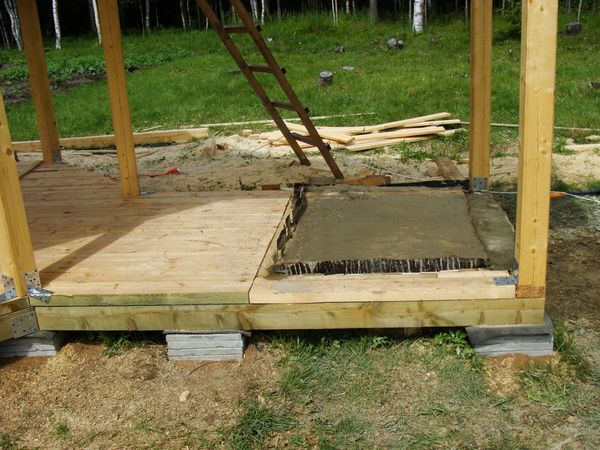
The bottom rail can now be laid. An ordinary timber will be used as the main resource.We knock everything together with nails, we connect with self-tapping screws on wood. Use corners to increase strength. From the start, the gazebo is planned only for the summer; over time, they often decide to glaze it.
We got to the stage where the floorboards need to be laid. Do not forget to properly treat the material with impregnation to protect it from decay. On sale you will find a lot of different protective equipment.
Advantages of wood: natural composition and beautiful appearance. Floor coverings are as follows:
- Deck board is the best option. The material is moisture resistant, not afraid of temperature extremes, mechanical influences.
- Decking - makes the surface even and durable, a good combination of wood and plastic.
- Garden parquet - beautiful original floor tiles.
Having decided on the material, we get to work. Even a person with minimal construction skills can independently lay a wooden floor. It is necessary to properly tie the bottom of the foundation with beams. The logs are already reinforced with nails, corners. The wood flooring can now be laid. Leave tiny gaps between the boards to ventilate the air. Do not forget that the wooden floor must be carefully looked after, otherwise it will quickly lose its sophisticated appearance.
Frame and walls
Next, we mount the racks from the timber. We put them in the corners, in front of both sides of the entrance, on the rest - above the supports. We connect the top with a strapping.
Make sure the racks are straight upright. For accuracy, use a plumb line, set everything along it. Evaluate the vertical on two adjoining sides. The racks must not collapse. We provide fixation. To do this, you can use jibs, which can be permanent and temporary. Such compact triangles give strength to the structure, the building will not stagger.
The racks are installed and secured, now you can make the top strapping. The process is usually straightforward. Here again we need corners that will increase the reliability of the connection.
Roof
What the roof will be depends on the design features of the gazebo. The most varied choice is for rectangular structures. The easiest way is to erect a pitched roof. If the alcove is pentagonal, hexagonal, octagonal, the roof will be in the form of a tent. The most difficult thing in such a building is the connection of the rafters in the middle.
The roof is made of different materials: wood, metal, PVC. While the frame is drying, we assemble the rafter system. Triangles are obtained, which are mounted on the main structure. They are placed vertically, nailed to the beam of the upper harness. The roof is easy to build, but with a heavy downpour, water will get inside.
There are a lot of roofing options, we have considered the simplest of them. In order not to bother with each triangle, they make a template. We take a piece of board, cut out a hole of the desired shape, try it on, adjust it to size. The most convenient way is to cut out the molds with a jigsaw. We throw the prepared triangles up and mount.
When their installation is complete, we stuff the crossbars: two on both sides of the ridge, then with a step that varies depending on the type and type of material for the roof. We paint the rafter system. When it is dry, we mount the roofing material.
Beautification
Having finished with the main workflow, we proceed to decorate the structure. Even the most pragmatic gazebo can be an elegant component of landscape design. For finishing the arbor, we recommend using the lining. A wooden gazebo can convey a calm or solemn mood. Forging, stucco molding, imitation of columns, etc. are used as decoration elements.
Do not be afraid to experiment, in modern conditions you can combine different materials. Lay out paths of stone, build a rock garden near. However, it is important not to overdo it with the decor, there should be a balance in everything.
Features of tree care
In order for the wood to serve for a long time, while maintaining an attractive appearance, it must be treated with an antiseptic. Stain, varnish and other components will help to extend the "life" of the material, protect it from the harmful effects of moisture and insects.
A wooden gazebo with your own hands is not only simple, but also interesting. Completing the construction step by step, a beautiful and comfortable gazebo will soon appear on the site. One of the advantages of self-erecting a structure is saving money. In addition, it is much more pleasant to relax in the gazebo, knowing that you have built it.

